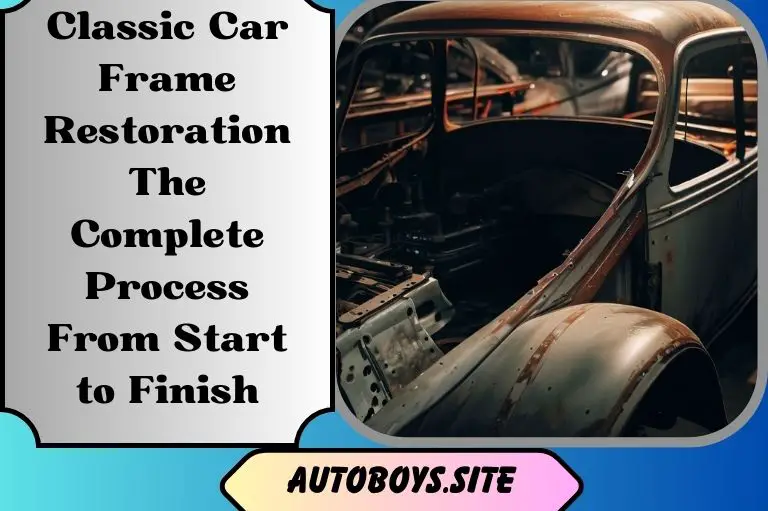
Classic Car Frame Restoration: The Complete Process From Start to Finish
Classic car frame restoration is a labor of love that requires patience, skill, and an unyielding dedication to craftsmanship. For the true classic car aficionado, restoring a vehicle’s frame to its original factory condition is the only option.
In this guide, we will walk you through the entire classic car frame restoration process to return your cherished vehicle to its former glory. From disassembling the car down to its bare frame to metal shaping, welding, and finishing, we cover every step required to resurrect a classic car frame. If you harbor dreams of cruising down the open road in a fully restored classic car, frame restoration is an essential part of the journey. Follow along as we share the secrets of the trade from expert restorers who have devoted their lives to preserving automotive history. The road ahead may be long, but the rewards of a job well done are eternal.
Preparing the Classic Car Frame for Restoration
Preparing the classic car frame for restoration is the most important first step. The frame and chassis must be completely stripped down for a full restoration. This includes removing the interior, external panels, engine, gearbox, and transmission.
Once stripped, the frame should be thoroughly degreased using a commercial degreaser or solvent. Wire brushes and abrasives can then be used to remove surface rust and debris. For stuck-on grime, a sandblaster may be necessary. The frame should then be inspected for any structural damage or corrosion and repaired or reinforced as needed.
Quality welding equipment, like a MIG or TIG welder, and welding skills are required for frame repair. New frame sections can be cut and shaped from sheet metal to replace heavily damaged areas. The repaired frame needs to be straightened on a frame rack or alignment jig to restore its original shape.
With the frame repaired, it’s ready for priming. A quality epoxy primer should be used to seal the bare metal. Two coats of primer provide good protection. Once primed, the frame can be painted in the original color to match the rest of the restoration.
Finally, new or restored suspension, brake, and fuel components can be reinstalled. With the drivetrain, interior, and body panels also restored and reassembled, the frame forms the backbone of your fully restored classic car.
Welding and Repairing Rust on the Classic Car Frame
Classic car frame restoration requires extensive welding and rust repair to bring the frame back to its original strength and appearance.
Welding Techniques
The most common welding techniques for classic car frame restoration are oxyacetylene welding, metal inert gas (MIG) welding, and tungsten inert gas (TIG) welding. Oxyacetylene welding uses a mixture of oxygen and acetylene gasses to heat and melt metal. MIG welding uses a spool of wire and an electric arc to join metal pieces together. TIG welding also uses an electric arc but with a non-consumable tungsten electrode and an inert gas like argon or helium.
For repairing rust damage, thicker steel plates are often butt welded over the affected areas. Butt welding joins the edges of two plates together to cover rust holes or weak spots. The plates should be cut to the shape of the area and secured in place before welding. Welding plating over rust damage can strengthen the frame without requiring complete frame replacement.
Finishing the Frame
Once welding and rust repair are complete, the final step is finishing the frame. Grinding the welds smoothly and applying a coat of primer helps prevent future rust. A coat of paint in the original color helps bring back the classic appearance. Undercoating, which is a thick, protective wax or rubberized coating applied to the underside of the frame, is also recommended to prevent moisture buildup and protect from road damage.
With proper welding, rust repair, and finishing techniques, a classic car’s frame can be restored to like-new condition and provide many more years of enjoyment. Using a combination of time-honored and modern methods, the dedicated classic car restoration expert can bring a frame back from the brink and keep a vintage vehicle on the road.
Straightening and Aligning the Restored Classic Car Frame
Once the frame has been cleaned and inspected, the straightening process begins. This involves placing the vehicle on a frame straightening machine and using hydraulic rams and chains to align the frame. Computerized measuring tools are utilized to ensure precise alignment according to the vehicle’s original factory specifications.
The frame straightening process can require cutting, welding, and shaping the frame to help bring it back into the proper form. Sections that are bent, twisted, or damaged are cut out and new metal patches are welded in. The frame is then clamped and pulled into the correct shape using the hydraulic rams. This step requires an experienced technician to slowly and carefully align the frame, checking measurements frequently.
When the frame is straightened, it moves on to the welding process. New patches and joints are welded, and seams are reinforced. All welding is done according to industry standards to ensure maximum strength and safety. Once welding is complete, the frame is ready for finishing.
The finishing process involves grinding down welds and rough areas, and then applying a rust-preventing primer. Multiple coats of primer are applied, with sanding between each coat. Once primed, the frame is ready for the final color coat which is matched to the vehicle’s original color. Multiple clear topcoats are then applied to protect the new paint and provide a durable finish.
With the straightening, welding, and finishing processes complete, the frame restoration is finished. The frame can now be reassembled and reinstalled on the vehicle to continue the restoration. Proper frame restoration and alignment are key to ensuring your classic car handles, brakes, and drives as they did when new. With care and attention to detail, your classic frame will provide many more years of service.
Priming and Painting the Restored Classic Car Frame
Priming and painting the restored classic car frame is one of the final steps in the restoration process. It protects the frame and allows the beauty of the restoration to shine through.
Applying the Primer
The first coat applied to the bare metal frame is primer. Primer creates a uniform surface for paint to adhere to and protects the metal underneath. For the best results, apply 2-3 coats of primer, letting each coat dry as directed. Lightly sand the primer with 400-grit sandpaper between coats to provide a “tooth” for the next coat of primer to grip onto.
Modern urethane primers are durable and provide an excellent base for urethane paints. They can be top coated in just 30-60 minutes. Epoxy primers also work well and provide superior corrosion resistance but require 8-12 hours of dry time before painting.
Block Sanding
After the primer has dried, the frame must be block sanded. This involves using sanding blocks to make the primer smooth and level. Start with 400-grit sandpaper, progressing to 600 and 800-grit. Block sanding removes imperfections and creates an ultra-smooth surface for the paint. Wipe away dust with a tack cloth after block sanding.
Applying the Paint
With the frame primed and sanded, it is ready for paint. For the most durable finish, a two-stage urethane automotive paint is recommended. Apply 2-3 coats, waiting 10-15 minutes between coats. Let the final coat dry for at least 24 hours before unmasking.
Urethane paint produces an incredibly glossy, durable finish that requires a clear topcoat for protection. The topcoat also enhances the depth and shine of the paint. Apply 2-3 coats of urethane clear topcoat, waiting 10-15 minutes between coats. Let the topcoat cure for at least 24-48 hours before handling the frame.
The priming, painting, and finishing of a classic car frame restoration requires patience and precision but results in a stunning show-quality finish. With care and the proper techniques and materials, an amateur restorer can achieve professional results and have their classic car frame looking factory-new.
Reassembling the Restored Classic Car Frame
Reassembling the restored classic car frame is a meticulous process that requires patience and care. Once the frame has been stripped, repaired, and refinished, the reassembly process can begin. This involves bolting the brake, suspension, steering, and drivetrain components back onto the frame.
The first step is to reinstall the brake components, including the master cylinder, brake lines, brake drums or disks, and calipers. The brake lines are connected and secured, and the master cylinder is mounted to the frame. The brake drums or disks then slide over the axles, followed by the calipers.
Next, the suspension, including springs, shock absorbers, control arms, and axles, is reattached to the frame. Leaf springs are bolted at each end to the frame, while coil springs fit over the shock absorbers, which are then connected to the control arms and frame. The axles are connected to the leaf or coil springs and control arms.
The steering components like the steering box or rack and pinion, tie rods, drag link, and spindle are then reinstalled. The steering box or rack bolts to the frame, while the tie rods and drag link connect the steering box to the spindles at each front wheel.
Finally, the drivetrain, including the engine, transmission, driveshaft, rear end, and wheels, is put back in place. The engine and transmission are lowered onto the frame, the driveshaft is connected between the transmission and rear end, and the rear end is bolted to the leaf springs. The wheels can then be put on, completing the reassembly.
With care and patience, the restored classic car frame will be ready to hit the road again. Meticulously reassembling each component will help ensure it handles as well as the day it leaves the factory.
Conclusion
Restoring a classic car frame is challenging work that requires patience, skill, and a passion for craftsmanship. But for the classic car enthusiast, seeing a vintage vehicle return to its original structural integrity and beauty is tremendously rewarding.
By following the steps outlined in this guide, a determined hobbyist with some welding and metalworking experience can restore a classic car frame at home. For those lacking the time, tools, or ability, many reputable classic car restoration shops can handle frame restoration and get your cherished vehicle back on the road. However you choose to proceed, frame restoration is a vital part of the classic car revival process. With some hard work and dedication, that beloved antique sitting in your garage can be structurally reborn.